Tuesday, 15 July 2014

Village Day and Competition winners

Part two of the photo gallery for this month - including pictures of a mostly dry Village Day, 3D card competition winners and Stamping challenge winners.

Firstly our stall. We needed the gazebos this year and clothes pegs to hold them together and prevent leaks!

First time ever it's rained on us at Village Day!
Linda - you should have sent your raincoat!

General birthday cards

Cards and peg magnets

Special birthday cards and bookmarks

Notebooks, card sets and Sally's picture frame - evidence!

Other occasion cards and Get Well tissue packs

Kids and New Baby Cards

Sweetie treats

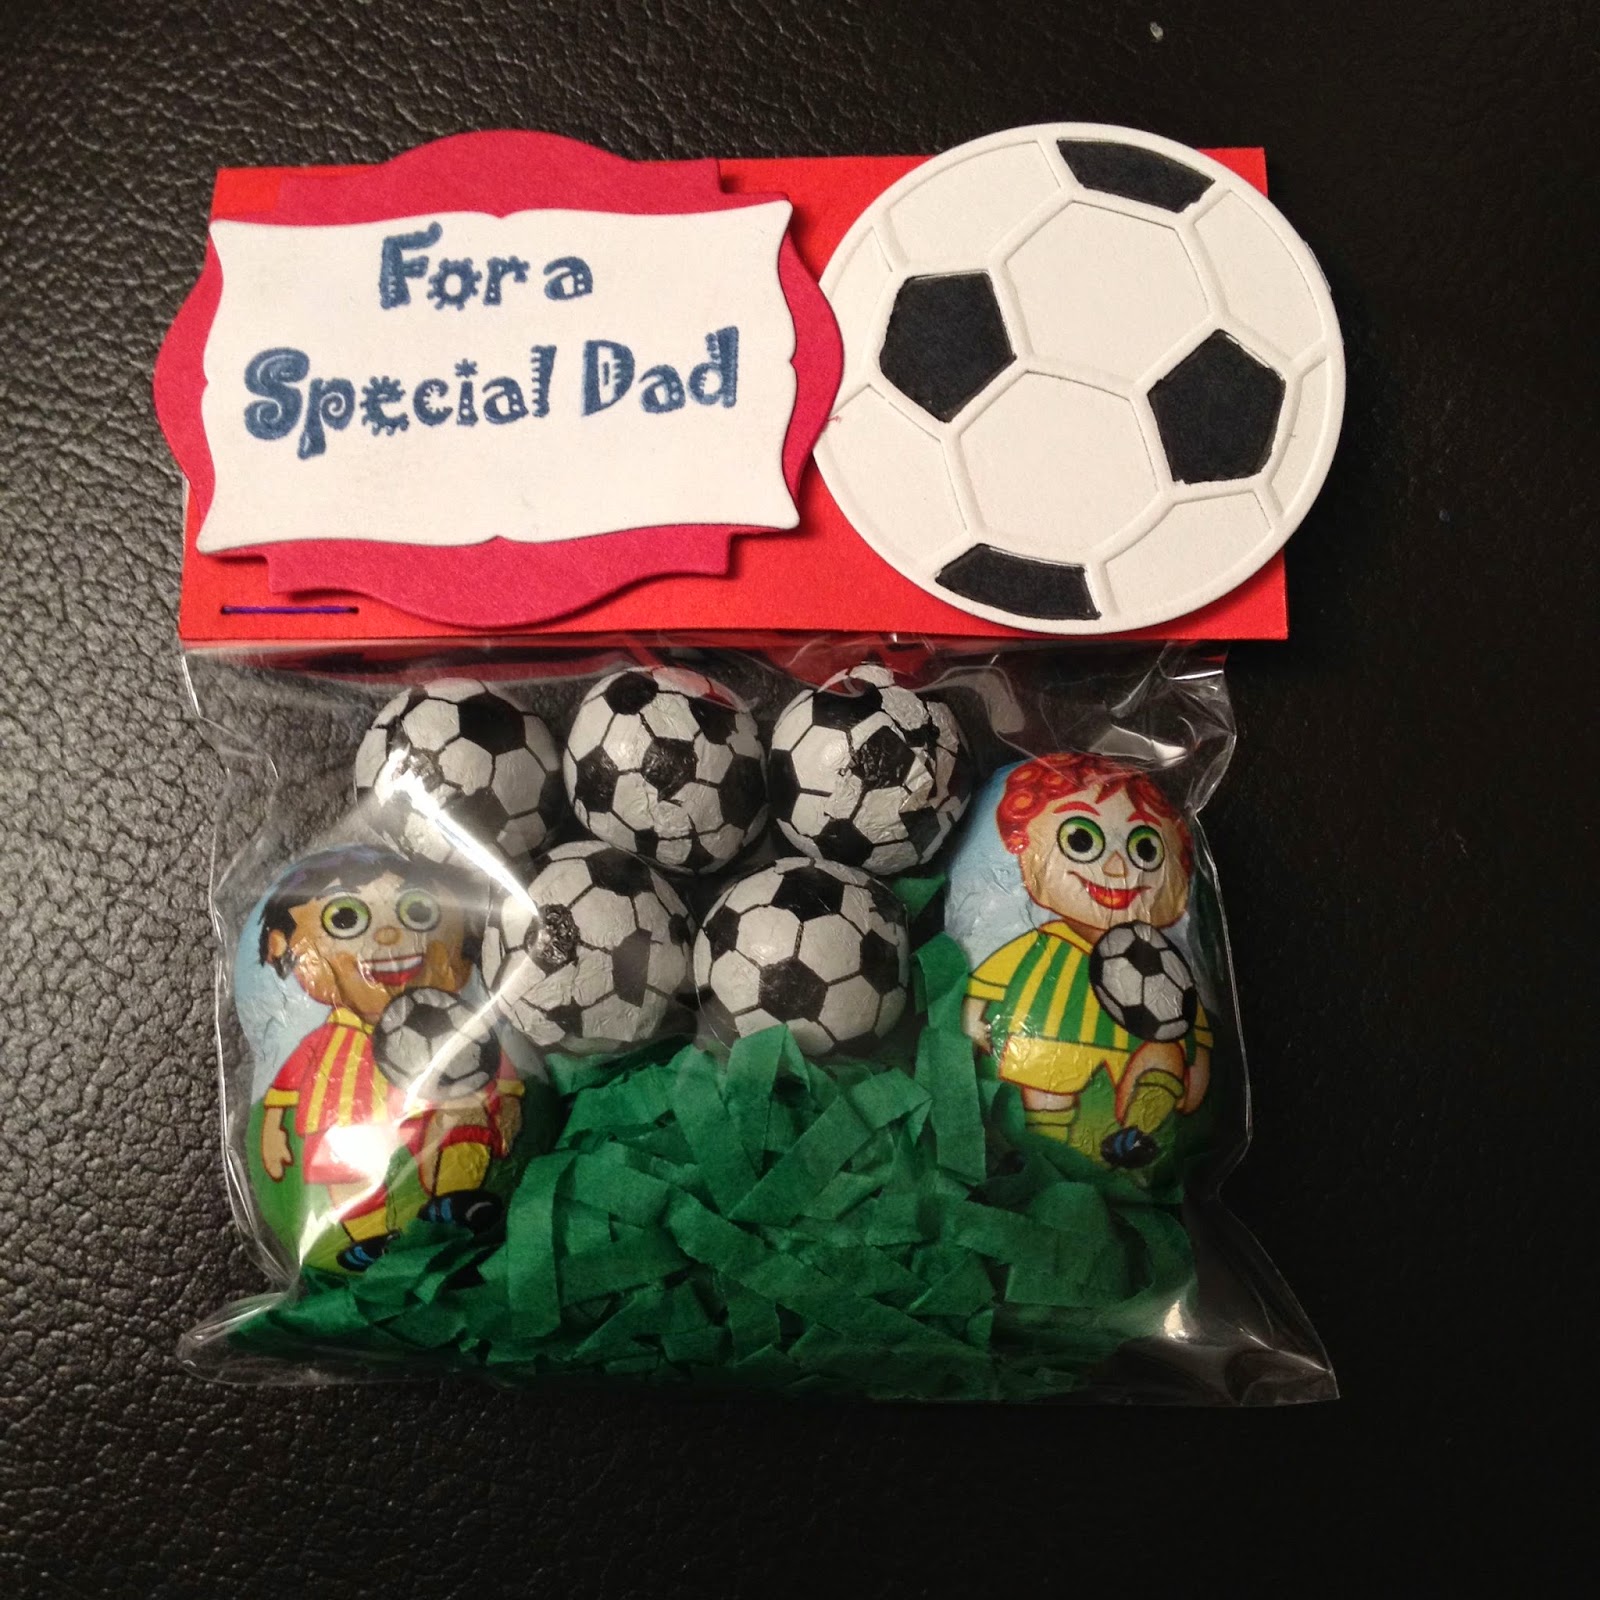
Football themed Father's Day gifts


Secondly, the competition entries. A big thank you to Joy Wemms, Rotary President, for judging our competition. Well done to Mandy our winner and Carol S our runner-up. Mandy won some crafty goodies and her membership fee back and Carol also received some crafty goodies.

Joy Wemms with the competition entries

Mandy's winning entry

And thirdly the best entries in our bi-monthly challenge this month, as voted by you at Card Club. The challenge was to showcase a stamp you like and a stamp you don't. The votes were counted and pages are shown in reverse order below. Third place was D - not sure whose this is. Please let me know and I will add your name in lights to the blog! Second place was Kay B - Project C And finally congratulations to...  Linda W, project H, who came first and wins a free workshop next time. Well done Linda.


Sunday, 13 July 2014

Alcohol ink gallery

Kay combined our two workshop techniques by
creating a floral design on a tile

Photos of your projects from the last workshop - first up alcohol ink tile and washer designs. Very impressed with the vibrant colour choices. For a tutorial on decorating tiles with alcohol inks click here.


And secondly landscape and floral card designs on glossy paper. Click here for a video tutorial on creating landscapes with alcohol inks.


Tuesday, 24 June 2014

Alcohol Inks Anonymous!!


No ACMC hasn't changed it's name! Just the title of tomorrow's workshop. We haven't used our alcohol inks for a while so we decided to bring them out again and as always you can revisit familiar techniques or have a go at a few new ones. Alcohol inks work best on non-porous surfaces, so tomorrow night Michelle will be showing you how to create the psychedelic tiles above. She will also show you how to ink up washers to create pendants for making into necklaces.


I'll be in the card corner, where you can experiment with dropping the ink directly on to acetate or glossy paper, then either letting it do it's "thing" or blowing it with straws to create floral designs. Or you can experiment with "painting" with the ink to create landscape pictures. 


It could be messy so you might want to bring an apron!

Wednesday, 11 June 2014

Ashtead Village Day 2014


Ashtead Village Day is fast approaching. You can find us at stand A3, on the left hand side just after you enter the field from Barnett Wood Lane entrance. We will have our usual selection of hand made cards, gifts, jewellery and sweetie treats for Father's Day and other occasions. Come and see us if you are planning to attend - the weather forecast is good - 20 degrees and sunny!

For Father's Day it has to be a football theme...


And where there's football there's usually beer... or is there? Our beer treat cups are suitable for Dads with a sweet tooth and they are non alcoholic.


And there's something for the kids too - Frozen goodies for the girls...


And Minecraft Creepers for the boys...


Should be a good day.


Saturday, 31 May 2014

Your Cards in 3D - no silly specs required!


Here are some of the cards made at the 3D workshop on Wednesday - along with some work in progress shots. The first cards shown here were made using the Sizzix Accordion die. As you can see it lends itself to a variety of occasions.


The star card - made from a triangle shape cut out of a 12 x 12 sheet of card - adds an interactive element for the receiver of the card. Click here to view a tutorial.


And finally the concertina pop out card, made from two scored square card blanks, is perfect for decorating for that special birthday or Anniversary. It's easy to score your own or you can buy the kit from pre-scored kit from Craftwork Cards.


Monday, 26 May 2014

Taking it to another dimension

At this month's workshop the theme is 3D/shaped cards. Kay will be showing you how to make a star card out of 12 x 12 card, with a few clever folds. Could even be your first Christmas card for 2014! But it doesn't have to be!


Michelle will be showing you how to create an accordion style card using a Sizzix die.


Don't forget to bring your "Showcase a stamp you like and a stamp you don't" project pages to be in with a chance of a free workshop.

I will see you in June. Have fun!

Thursday, 8 May 2014

Top tiles...


A big thank you to Kay and to Sue who did our demos last week. And very well done to Sue on her first demo for us at the club. Our theme was "Not simply stamping" so both techniques focused on using stamps in a slightly different way. The layered stamp technique is demonstrated below.


In this example two squares of white card have been cut to different sizes. The smaller square has been stuck down in the centre of the larger square using low tack tape or low tack glue. The stamp was then inked up and stamped down on to both pieces of card.


The result is as shown in this picture. The depth of the card, although not very thick, creates a white border around the smaller square where no ink is stamped. It can be left as it is...


...or both pieces can be matted and mounted on to a card blank, creating the effect of layering the stamped image. Gives a great monochrome effect when the card is matched to the ink colour too.


More examples of the technique and the completed cards. Love the black and white!


The technique can also be applied to printed papers - doesn't have to be restricted to stamping.


Sue's demo focused on creating a tiled effect from stamped images, either by stamping the image, cutting it up and then mounting it on backing card...
...or by first scoring your card in a tiled pattern and then stamping your image over the top. This worked brilliantly on the pearl glossy card. Sue also demonstrated how to use a cut out spare tile piece to mask the stamped tiles and ink up the edges with distress ink to give a shaded 3D effect to each tile.


The feather stamp worked really well and proved to be quite popular.